Tuesday 31 January 2012
Target Audience
Psychological Thrillers attract older audiences because they are more intelectually demanding. Our target audience will be around 15-45. This is because we are using the film 'Orphan' as an inspiration and it is rated 15+ therefore we decided to make our rating the same because we want a similar target audience. Our thriller will also be more female appealing because of the use of children (especially a girl as the main character).
Mise en scene
Location:
*Quiet road near Finsbury Park
*Finsbury Park
*Anaya's house/bedroom
Props:
*Teddy Bear
*Toys
*Adoption papers
*Scrapbook
*Magazines/Newspapers
*Child's drawing
*Paint
*Fake Blood
*Male shoes, female shoes, female child shoes.
*Clock
*Red Lipstick
*Quiet road near Finsbury Park
*Finsbury Park
*Anaya's house/bedroom
Props:
*Teddy Bear
*Toys
*Adoption papers
*Scrapbook
*Magazines/Newspapers
*Child's drawing
*Paint
*Fake Blood
*Male shoes, female shoes, female child shoes.
*Clock
*Red Lipstick
Monday 30 January 2012
Experimenting editing
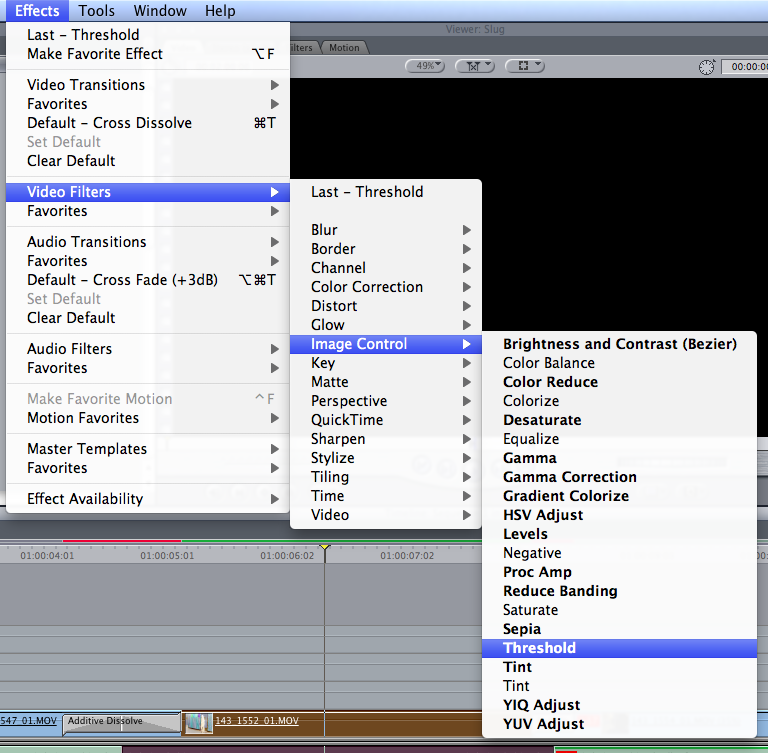
Because we will be doing a discrete opening the editing will be crucial to establish the mood of the film and make it thrilling. We were experimenting some different effects that we could get in our film:
Dragging the same clip on top of each other in the storyline, locking the original clip (the one underneath), then using the razor tool cut its copy into bits and then delete the bits in between. This would give an effect of dysfunction which could be interesting for our discrete opening.

To overlay two shots, we add them one on top of each other in the storyline, and then drag the line down to reduce opacity. As you can see in the following screen shot, the line is in the middle.


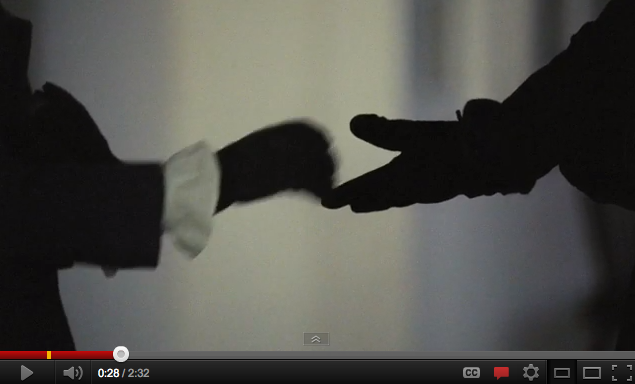
The effect 'Threshold' makes the video black and white with shadows.

This is the result of the effect 'Threshold'. It creates a dark, dramatic mood.

'Radial blur' creates a motion blur, giving a sense of speed, or like a 3D image.

This is the result of 'Radial Blur' effect. I think it will be nice to use it in our discrete opening to show the girl's tormented mind.

The effect 'earthquake' can also be an interesting effect to give to our thriller. It shakes the image, exactly how its name says, it gives an 'earthquake' sense.


To overlay two shots, we add them one on top of each other in the storyline, and then drag the line down to reduce opacity. As you can see in the following screen shot, the line is in the middle.

The result of overlaying shot would be this:

Following these steps we can get a change in colours giving a psychedelic effect to the video.

This is the result of using the effect 'solarize':

The effect 'Threshold' makes the video black and white with shadows.


Planning
Today we started he planning for our film. We want to make a psychological thriller and use a child as the main character. Our character is a little girl who has been adopted. She has got schizophrenia and hears voices but her adoptive parents don't know it yet. These voices try and convince her to harm people that try to get close to her. We are doing a discrete opening, here are some of the ideas for the shots:
- Her holding hands with her parents and walking down the street. 4 sec
- Innocent face. 5 sec
- Holding the teddy bear. 3 sec
- Swing chains. 3 sec
- Children playing. 5 sec
- Her sitting on the swing. 3 sec
- Ripped teddy bear. 3 sec
- Adoption papers stamped. 4 sec
- Her cutting out images that reflect her mental instability and sticking in a scrapbook. (More than one shot - 10 sec)
- Trees. 3 sec
- Changing channels really fast. (3 shots - remote control 3 sec, face 3 sec, tv 3 sec) - 9 sec
- Destroying children's drawing. 3 sec
- Mary go round really fast. 5 sec (split it)
- Shoes in line, father, mother and child. (3 shots - 3 sec each)
- Shower on with blood. 4 sec (Shower flicks)
- Arms cut. 2 sec
- Hands on fence. 4 sec
- Clock. 2 sec
- Toys. 3 sec
- Playground toys (without kids) - (various shots, 3-4 sec each)
- Girl grabbing another child. 3 sec
- Girl smiling in an evil way, 4 sec
- Close up on her eyes. 3 sec
- Girl painting/drawing smiling (2 shots, girl, the evil picture). 6 sec
- Whispering in the corner. 3-4 sec
- Writing on the mirror. 10 sec
118 seconds in total.
Our mainly inspiration is the psychological thriller 'Orphan'. Here are some shots we are considering to 'copy':


Editing the prelim
The first editing of the prelim was very basic, we just needed to put the shots in order and make few adjustments. We added just a few effects that helped to fix some bits that seemed odd.

We put more attention to the editing of sound. First, in Final Cut Pro we selected the input and output points exactly where it starts and where it ends.

Then we export that to our hard drive.

We open Soundtrack Pro and drag the prelim to the storyline.

The bar at the bottom of the right side shows many options of different sounds we could add. We look for the ones we think are the most appropriate, as for example violins, pianos, drones, to create suspense. We can overlap sounds by adding them on top of each other.

To add a fade in or fade out effect, or simply change the volume we can pick the tool of a purple dot and make the points in the purple line underneath the sound.
Sunday 29 January 2012
Donnie Darko
I have just watched 'Donnie Darko', a psychological thriller about a teenager who is tormented by the visions of Frank, a giant rabbit that comes from the future. An airplane jet engine crashes through Donnie's bedroom while he is outside talking to Frank. Frank tells him that the world will end in 28 days, and convinces him to commit a series of crimes and leads him to find out about time travel. The end of the film is very confusing, so to be clearer about it I researched and found an explanation to the film.


Anyone connected to the Living Receiver who dies in the TU becomes Manipulated Dead. These people are very powerful and have the ability to travel through time. Frank is killed in the TU and therefore becomes one of the Manipulated Dead. He travels back in time and helps Donnie with his quest to return the Artifact. The first thing he must do is save Donnie by waking him up before he gets squashed by the jet engine.
All the people connected to the Living Receiver are the Manipulated Living and these people will subconsciously help guide the Living receiver. They will behave in the exact perfect way necessary to push Donnie toward his eventual destiny. [...]
At the end of the film a timestorm starts to form as Donnie drives up the mountain, it’s the beginning of the TU collapse and is centred over Donnie’s house which is where the TU began. Donnie constructs a time portal from water and guides the engine through it. This restores the Primary Universe back to October 2nd, the birth of the TU. The last 28 days never happened and Donnie wakes up in his bed laughing. The jet engine Donnie sent through the time portal then falls into his bedroom killing him."
The film audience clearly is older people as it demands a lot of intellectual effort to understand the story. The film is not very active throughout, but the idea behind it is interesting. I got very involved with the main character because I felt that the use of camera, sound and editing really got me into his mind.
 For example, many times when he was seeing Frank, we would get a camera point of view shot exactly from the same angle as Donnie. When he was hearing Frank, Frank's voice was hypnotic and echoing, which gives us a sense of being into Donnie's mind and hearing exactly what he hears.
 Often when Donnie had a connection with time travel or the Tangent Universe we would get a close up of his eyes and some special effects which would make it look like a robot/computer configuration. I think that his character is very interesting and for our thriller it would be nice to create or present a character inspired by Donnie Darko.


"The jet engine is actually from the future. There was a corruption in time and the engine fell through it and arrived on October 2nd. This has now created a Tangent Universe (TU) and the next 28 days is set in this alternate reality. This TU will only last 28 days, 6 hours 42 minutes and 12 seconds before it collapses and destroys itself and the Primary Universe.
Artifacts are evidence that a TU has been created, they are made from metal. The jet engine in this case is the Artifact. The only way to prevent the universe being destroyed is to guide the Artifact back into the Primary Universe through a time portal. This will close the TU and restore the Primary Universe at the point the TU was created (Oct 2nd). Donnie is chosen as the Living Receiver. It’s the Living Receiver’s role to guide the Artifact back to the Primary Universe. The Living Receiver is usually blessed with some supernatural powers during their time in the TU including Increased strength, the ability to conjure fire and water and telekinesis. [...]

All the people connected to the Living Receiver are the Manipulated Living and these people will subconsciously help guide the Living receiver. They will behave in the exact perfect way necessary to push Donnie toward his eventual destiny. [...]
At the end of the film a timestorm starts to form as Donnie drives up the mountain, it’s the beginning of the TU collapse and is centred over Donnie’s house which is where the TU began. Donnie constructs a time portal from water and guides the engine through it. This restores the Primary Universe back to October 2nd, the birth of the TU. The last 28 days never happened and Donnie wakes up in his bed laughing. The jet engine Donnie sent through the time portal then falls into his bedroom killing him."
The film audience clearly is older people as it demands a lot of intellectual effort to understand the story. The film is not very active throughout, but the idea behind it is interesting. I got very involved with the main character because I felt that the use of camera, sound and editing really got me into his mind.

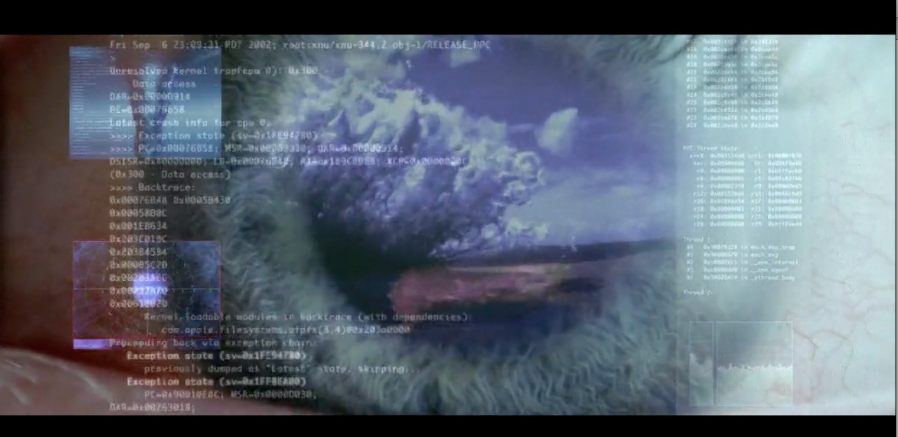 Often when Donnie had a connection with time travel or the Tangent Universe we would get a close up of his eyes and some special effects which would make it look like a robot/computer configuration. I think that his character is very interesting and for our thriller it would be nice to create or present a character inspired by Donnie Darko.
 In general, the film creates suspense not only by showing Donnie's tormented perspective, but also with the use of mise en scene and music - which I found particularly good. They use the weather (storm) to anticipate things, also the city seems to be in the middle of nowhere.


The most suspenseful parts usually were set in an empty place with low lighting. There was one main piano music throughout and I believe that the sound of piano helped to create suspense, besides there were some special effects like whooshing sounds that built tension.
Saturday 28 January 2012
Student Opening
The password is 'student'
12. Erika, Nathan, Poppy, Charlene from 283 goswell on Vimeo.
This opening film above is called violet made by previous students from my college.
Sound: The opening sound was the sound from a ballerina musical box. It was calm but gave that sense that something was not right. The sound of the musical box had the under beat sound of someones heartbeat pounding slowly. Then again after the underneath sound of the heartbeat they then included the sound the musical box makes when someone turns the key. After a while both the sound of heartbeat and key turning draws out but leaving that ballerina musical box sound still going with an underneath sound of like paper creasing together/burning. Then before the narrative voice over there was the sound of faint woosh sounds and someones shoe sound which made it spooky.
I think I liked the way that when the big drone came over that musical box sound as to indicate that it all begins now kind of thing, and infact that was the outcome from then on all the calm sounds had stop and it was all fast sounds which went with the editing.
Editing: There was a lot editing in this student opening. The opening credits, were white and bold but had a shaky/lightening edited effect. Then there was a change from colour to black and white on a particular scene where the man is looking or sorting out photo's. This shows good editing skills which were most likely done after filming that particular shot.I also noticed that everytime the scene went back to the house or inside the home the colour effects had changed to black and white apart from the place where the girl is in the bath and blood running down her skin. Then again, there was the effect of black and white but with flickering shots. All this presented that they were showing a flashback of a previous even that happened. I liked the fast pace editing that was used towards the end, which ended up being a dream.
Mise en scene:
Types Of Title Film Openings
In today's lesson we learnt about four different types of film openings for titles that are used in opening a films title sequence.
1.Credits over a blank screen
2.Discrete opening
3.Narrative opening
4.Stylised edited opening
Credits over a blank screen opening:
An example of this one is from Donnie Darko, where the background is blank, black colour with the credits coming unto the screen.


Discrete Openings:
These are separately edited sequences which are stood apart from the the film opening. It supports nearly all of the opening credits and film titles. An example of a film which uses this opening is Enemy of the State.


Narrative Opening:
This is when the narrative storyline comes together with the title sequence. Example is the 'Panic Room'


Stylised Editing:
This is a very heavily stylised editing film opening with amazing editing. An example of where this has been used is in the film 'Mezrine'
 |
| The layout shows the woman walking from the front and behind like someone is walking/watching behind her |
 |
| This is an opening credit of an actor in the film |
 |
| This again shows the front of that man walking and the back of him. It also has another actors name. |
 |
| The top left is a wide mid-shot of the man,while the image on the right is more close up portrait. The image on the bottom left is a mid shot of the man. |
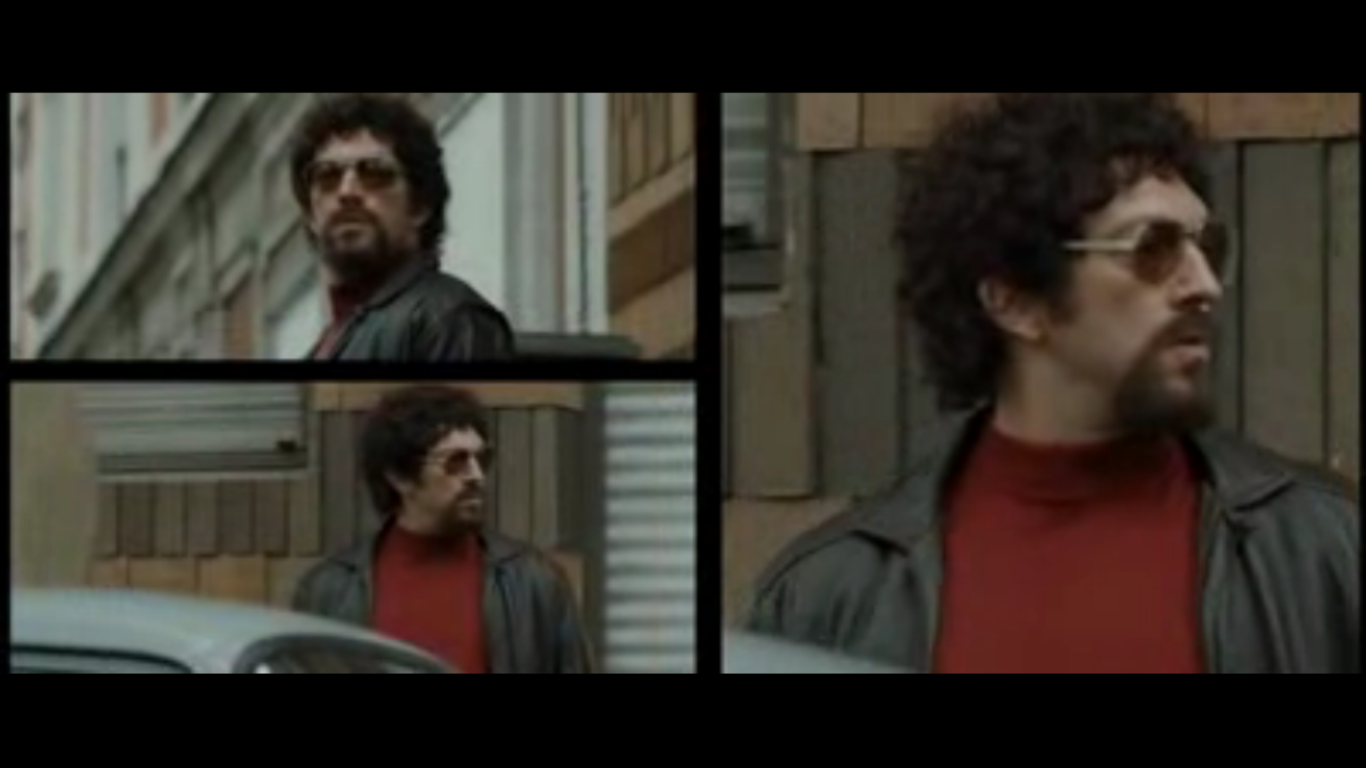 |
| This is my best one. I like the ways there are 3 shots on the screen, it looks like someone is looking at the man. |
Thursday 26 January 2012
Prelim
 This is our prelim. We tried to consider carefully our camera work while filming. We used a wide range of shots to practice and experiment. For example, in the beginning while Rachel is walking, we used three different shots to show her walking. This makes the walking less boring to watch. I also think that having this variety of shots when she is walking helps to create a suspenseful atmosphere together with the music. The music anticipates that something is wrong where she is going. Because the three shots seem to have a completely different perspective and don't fit nicely together, we added transitions like dissolve and fade in to make it have more sense and also creating ellipsis. The over the shoulder shot showing her walking is in slow motion which gives a dramatic effect and also adds power to her character as well as it implies there is something going on.


Then we have a close up of Angel's face, showing her nervousness. She was supposed to say some dialogue in this shot but we forgot it, still it fitted ok. The close up of her hands emphasise her nervousness and create more tension, suggesting that she has done something. While Rachel is walking away, we have shot reverse shots showing Angeline's reaction of disapproval. The prelim ends with an extreme close up of her face and a zoom in into her eyes expressing anger. The zooming in was slowed down in the editing to make it more dramatic. The music gets tenser when we get to the close up. The ending creates suspense.
Tuesday 24 January 2012
Planning
Bearing that our opening is a thriller, I have had ideas on what or how we could do.
I think that the title sequence should include some opening credits of like the important people. For example, the directors, editors, well known characters of importance etc.
An example of this can be taken from 'Pelham 123'. This introduces all the main people who helped in the production of the film and then the well known actors.
I also like the way the above clip is, the opening is done, its kind of a discrete opening. Having the digetic sounds of trains along with a basline non-digetic sound. It also has the credits move off the screen with the sound of a train moving and moving with it.
I observed the opening like the introduction to the production company 'Columbia' the screen was a small rectangle which began to widen, till everything was visible to the screen.
I really would like my group to try and borrow some features from 'Pelham'.


Monday 23 January 2012
Pictures of filming prelim
Here are some pictures of the filming process of our prelim :)


We didn't have any big problems with the filming, it was easy and quick and we didn't need to reshoot many times. This happened because we had everything very well planned before we start and we were very focused. What we can take from this is that if we plan our real film carefully and prepare ourselves before filming, we will be able to carry on with it easily and without many problems.
Prelim storyboard - Animatic
To make the storyboard for our prelim we decided to draw it very roughly just to organise our ideas, and then take pictures of it to have a better visualised idea. We did our animatic with the pictures and added our dialogue to it. Here are some screen shots of our editing process:

To make the animatic was very easy, as the process is the same we are familiar to, and as they are stills there is no much need of cutting, changing things, adding effects, etc. We just put the pictures together in the order of the storyboard and adjust how long we wanted them to last. We also added some text to indicate a type of shot or speech.


This is the animatic of our storyboard:
Subscribe to:
Posts (Atom)